Content
The content section allows us to control the navigation menu, content pages, news and editorial team in Janeway.
Content Manager
The Content Manager is Janeway’s CMS. Pages can be created an edited using our rich text editor.

Content Manager
Add a New Page
To add a new page to your journal select “+ Add New Page” and fill in the fields as detailed in the text beneath each field.
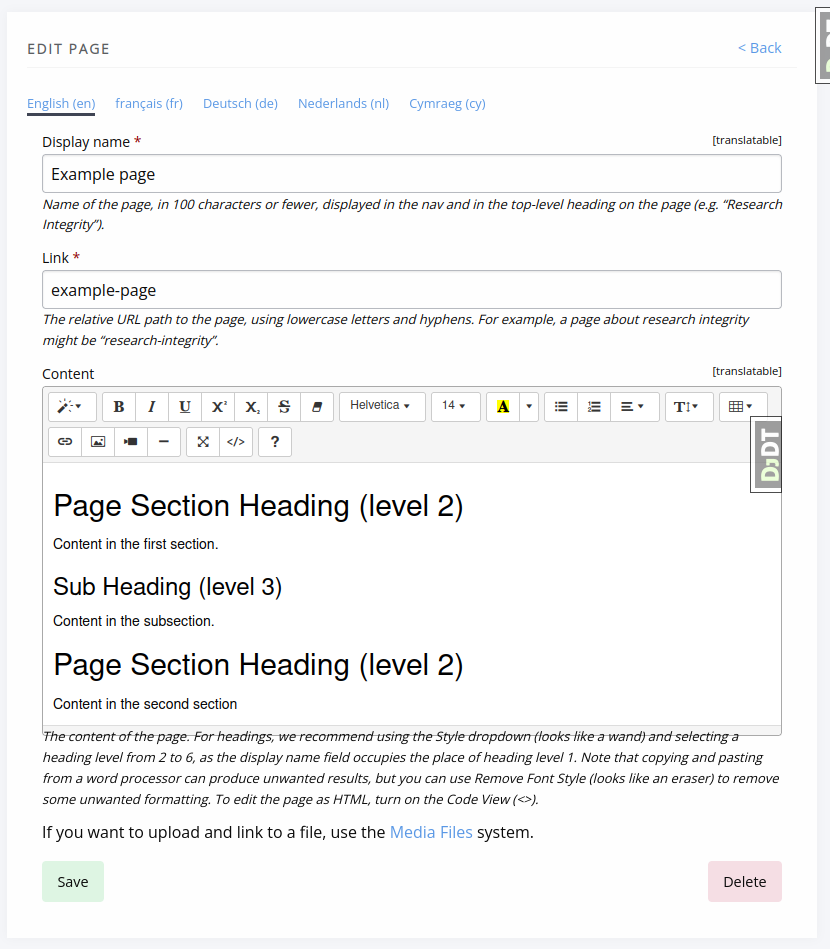
Editing a page in the content management system
The URL for the page will be generated with these parts:
Your journal’s domain name (e.g. orbit.openlibhums.org)
The path element “site” (a namespace for custom pages)
The path you entered in the Link field.
An example: https://orbit.openlibhums.org/site/privacy
Edit a Page
From the Content page you can see a list of the pages currently on your journal. Select Edit to make changes.
Delete a Page
To delete a page use the red Delete button.
Warning
Data cannot be recovered so ensure you really want to remove a page before pressing the delete button.
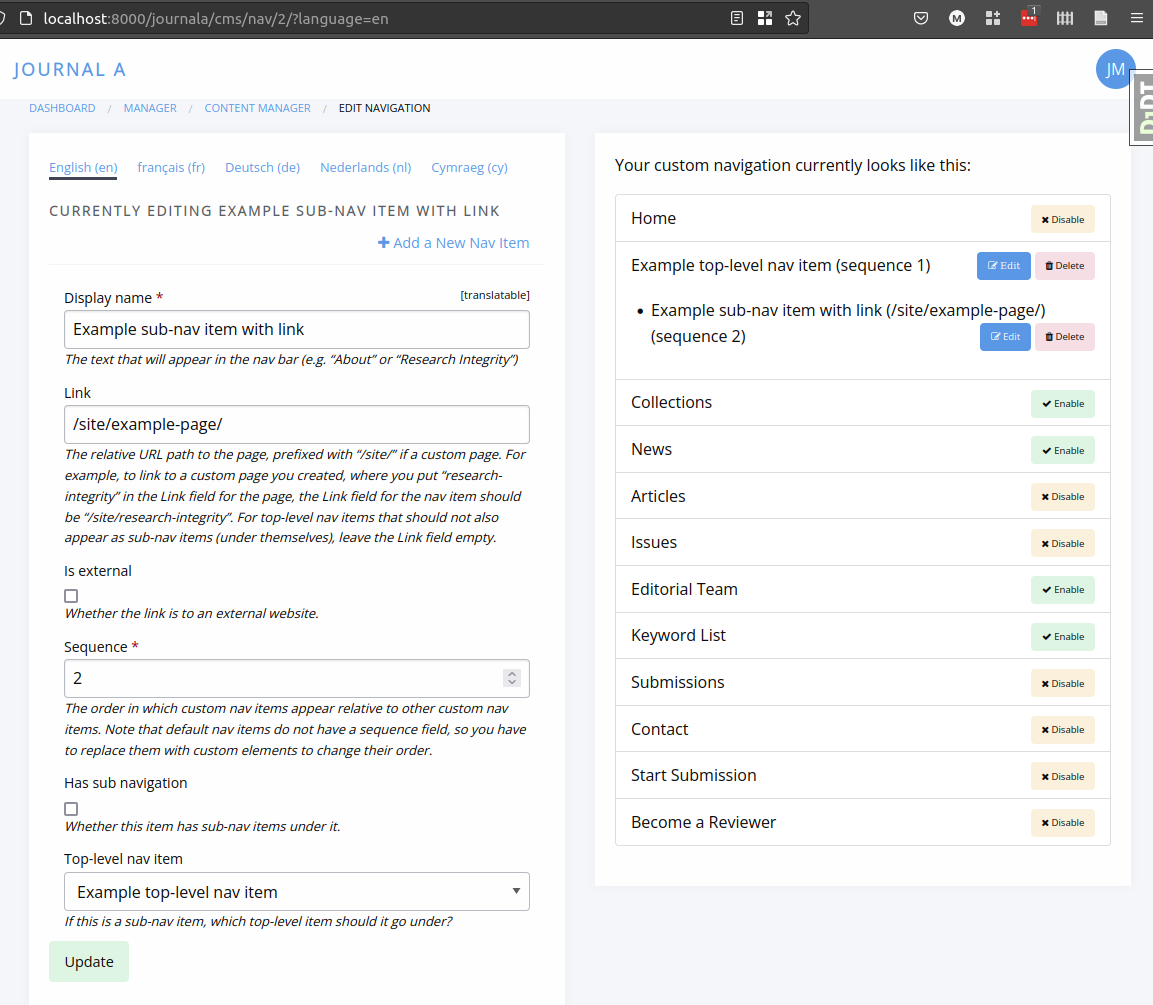
Navigation
The nav bar is made up of two kinds of items:
Fixed nav elements that you can turn on or off
Custom nav items that you can create and modify
Fixed nav elements include:
Home
News
Articles
Issues
Collections
Editorial Team
Submissions
Contact
Start Submission
Become a Reviewer
To add a new custom nav item, from the content manager page, select “Edit Nav” and fill in the fields as desired. Details of how each field works are displayed below the field.
Footer Navigation
With some themes, you can put a navigation link in the footer rather than the top navigation bar.
Use For footer to switch the link to the footer. At the press level, only the path theme support this feature so far.
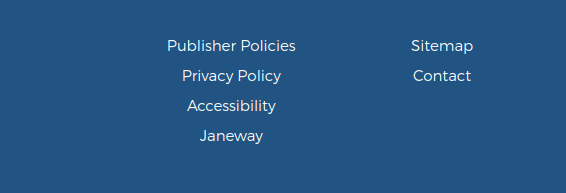
Custom footer links in the path theme
Press managers can also create custom footer links that extend to all journal websites, such as for publisher policies.
To do so, create a navigation item and check Is external, For footer, and Extend to journals.

Custom footer links on a journal website set by a press manager
News Manager
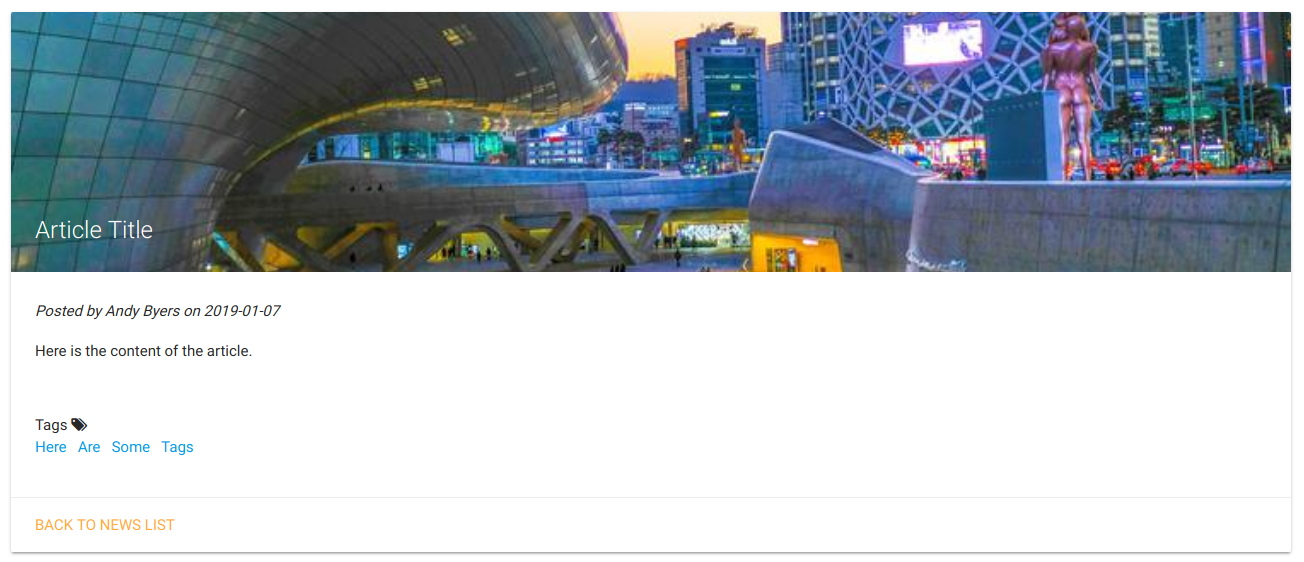
The news manager allows you to create news items, assign display and take down dates and upload images to display alongside them.
News items can also displayed in the carousel.
To add a new news item select the News Manager. The interface displays exiting news items on the left and a form for adding new items on the right.
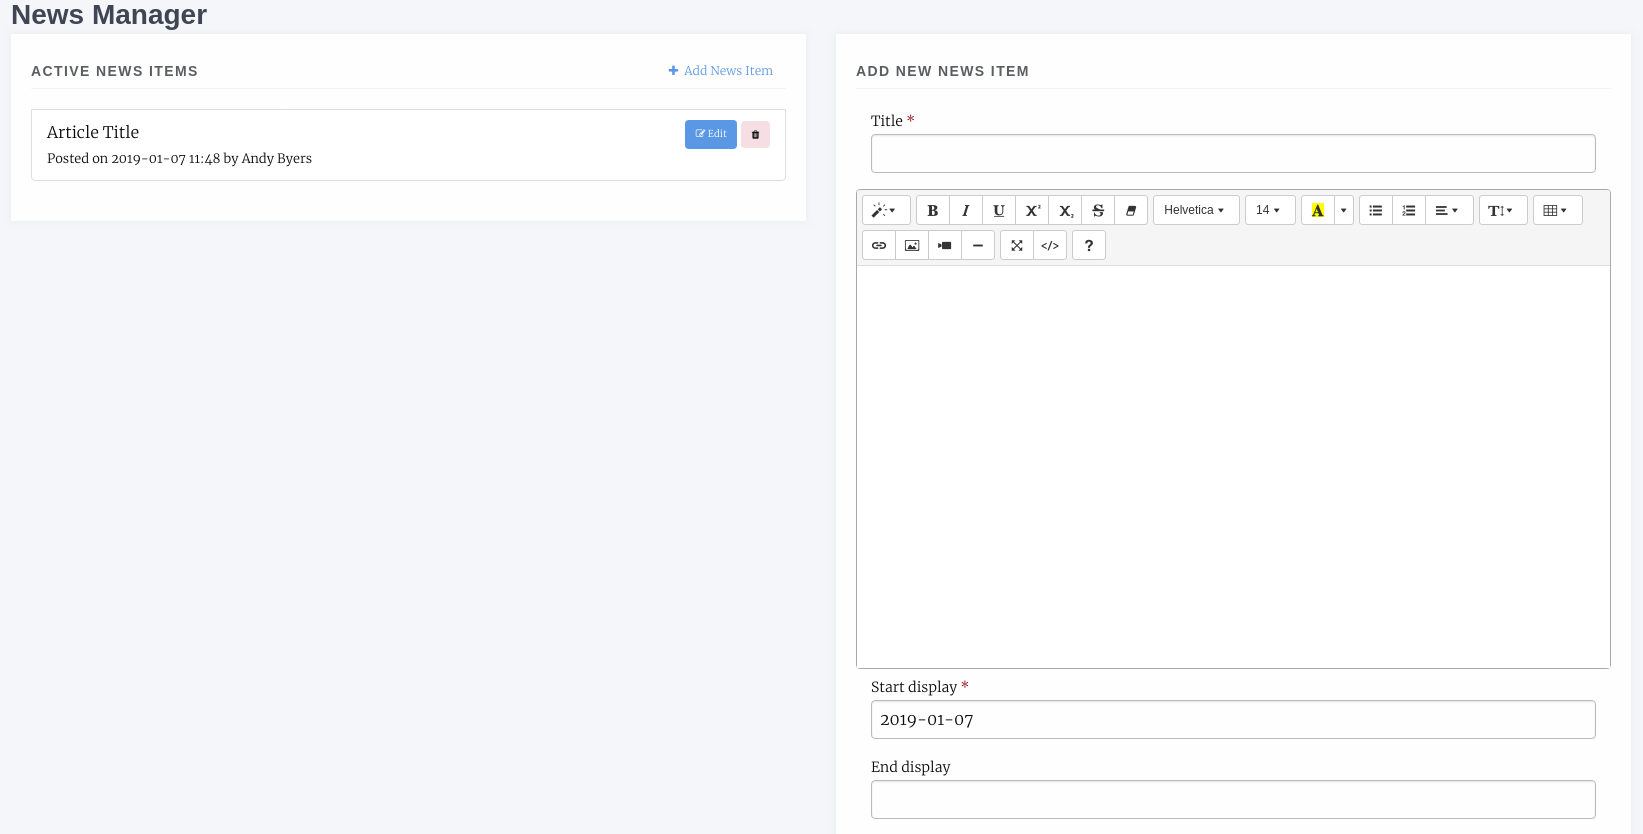
The form fields include:
- Title *
The title of the news item
- Body *
The HTML body of the news item
- Start display *
The date to start displaying this news item
- End display
The date to stop displaying this news item (can be left blank to display forever)
- Sequence *
Use for sorting when news items are posted on the same day
- Image file
An image file to fit the news piece, ensure you have the rights to post it
- Custom Byline
Lets you overwrite the name displayed as the originator of the news item
- Tags
A series of tags/keywords for the piece, you can filter news items by tags
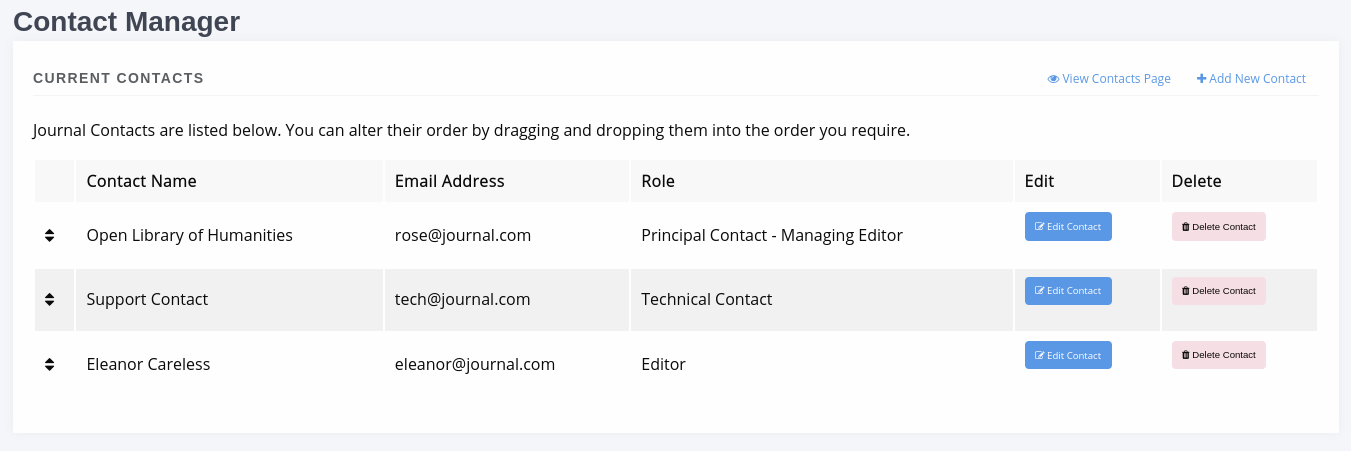
Journal Contacts
You can control the contacts listing for your journal by adding and removing contacts through this interface. Only three fields are used for this:
- Name
The contact’s name
The email address that should be contacted
- Role
The contact’s role e.g. Editor or Publisher
Each outgoing message is recorded in the database and can be viewed in the admin area by staff.
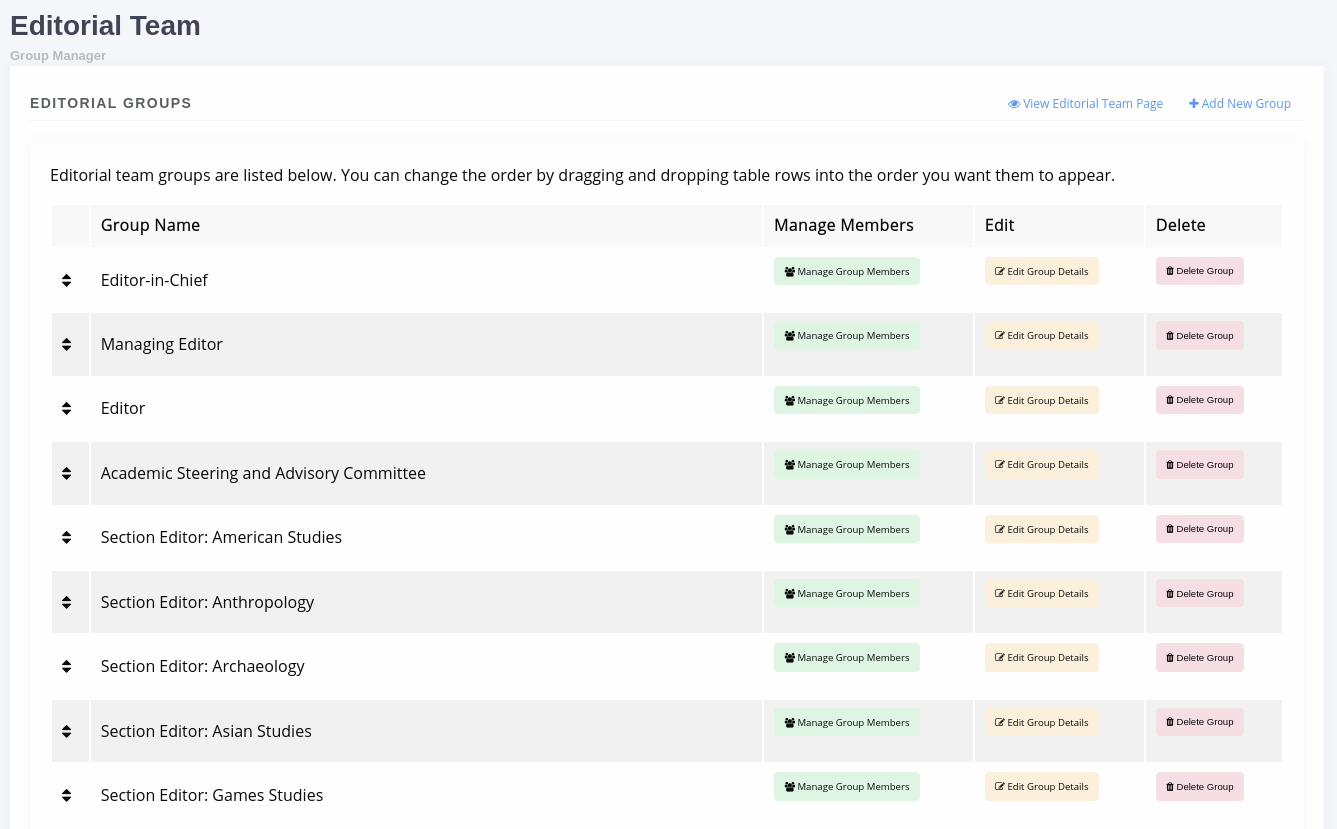
Editorial Team
The Editorial Team interface is relatively complex and is made up of:
Editorial Groups
Editorial Group Members
You can create as many groups as you like and add as many members as you like.
When you access the interface the form for making a new group is displayed on the right of the page and the existing groups listed on the left. For each group you can:
Edit the membership
Edit the group details
Delete the group
Drag and drop to re-order them
Tip
As of version 1.4 the Group description field supports HTML and presents a rich-text editor. If you do not wish to add an account for each user you can simply list them in the rich text box using, for example, a bulleted list.
Adding a New Group
Creating a new group allows you to add members and display them on the Editorial Team page. Each group is headed by the group name you supply.
- Name
The group name e.g. Editoral Team or Advisors
- Description
Displayed under the Name header on the Editorial Team page
- Sequence
The order the groups should be displayed, you can reorder the groups by editing their sequence or by dragging and dropping their record
Adding Members to a Group
For an existing or newley created group you can use the Edit Members button (Green with a group of outlines) to change the membership of the group.
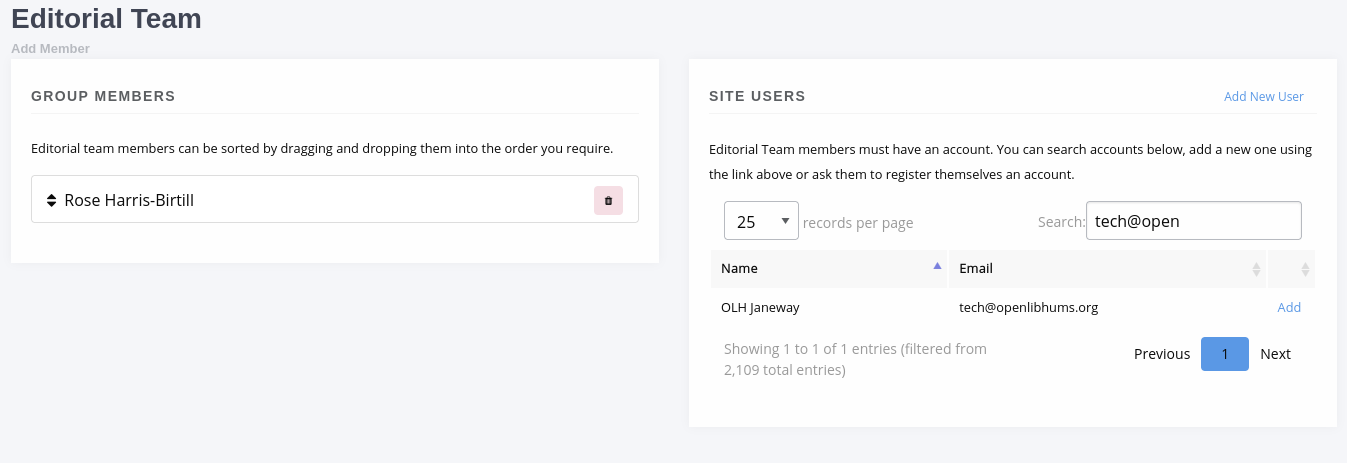
An editorial team
On the left is a list of the current members, you can:
Delete a member from the group
Reorder the members by dragging and dropping a listing
Journal users are listed on the right and you can add a user to the group using the Add button. If a user account does not exist for the user you can use the Add New User button to add them.
Submission Page Items
A new addition to v1.4 the Submission Page Items system lets you totally customise the Submission page to your liking. The existing submission items have automatically been setup for you and can now be edited.
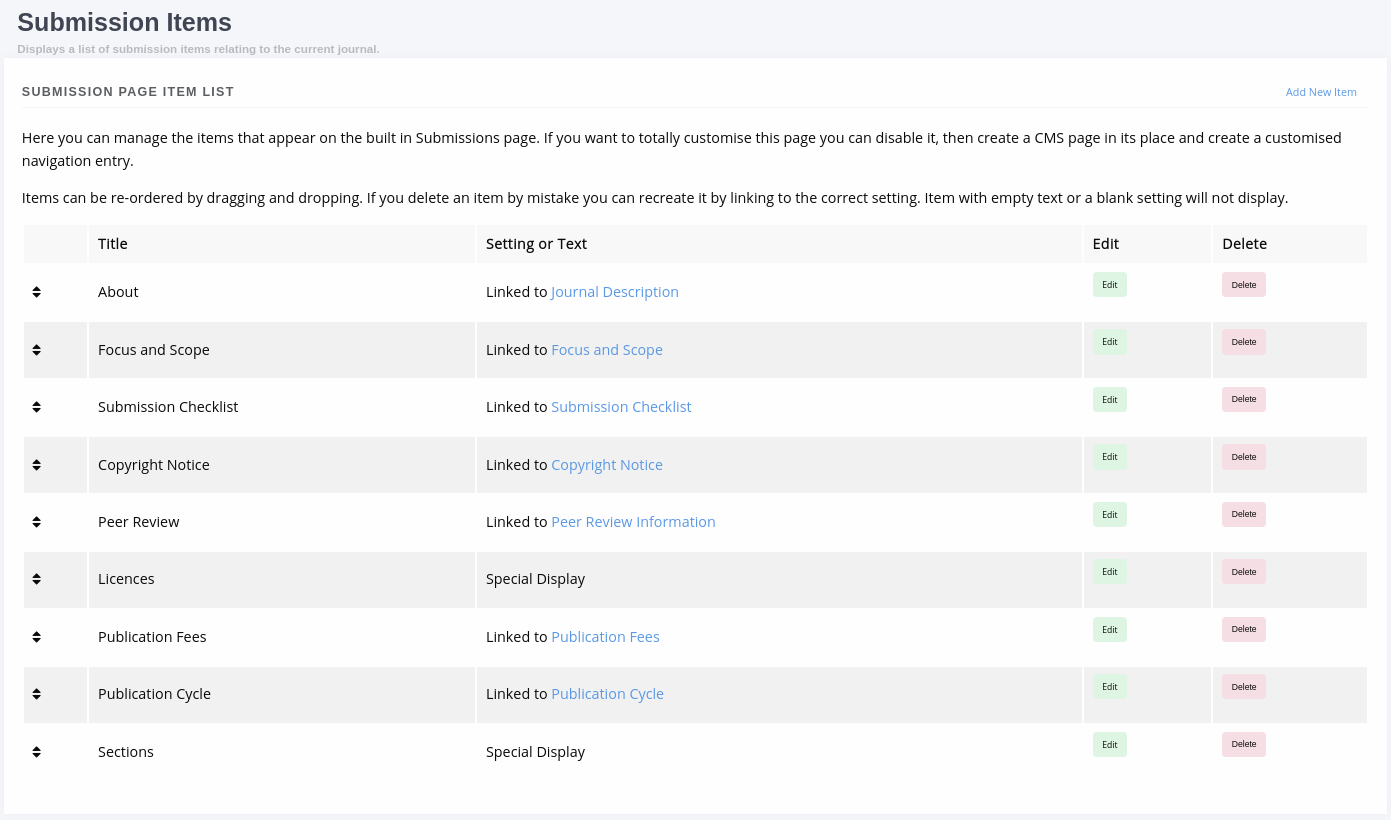
List of default submission items generated in the v1.4 upgrade process.
You can manage submission items in three ways:
Link to a setting
Custom HTML
Special Display
From the main screen you can add new, edit existing and delete items as well as re-order them by dragging and dropping rows of the table.
List of default submission items generated in the v1.4 upgrade process.
Link to a Setting
You can opt to link a submission item to an existing setting so it will display the same content as that setting. This is currently used for the majority of the automatically generated submission page items. Some examples of this are:
About
Focus and Scope
Submission Checklist
You can tell when a submission item is linked to a setting under the ‘Setting or Text’ column in the main table or the ‘Existing setting’ field being completed when editing a submission item.
Custom HTML
A submission item can also just have some custom HTML, you can fill out the ‘Text’ rich text box. When using the Text field you should not select an Existing Setting or this will take precedence when the page is rendered.
Special Display
Special Display settings are used to display Licenses and Sections on the Submission page. To add these blocks you need to set the title of the item to either:
licenses
or
sections
You must also leave ‘Text’ and ‘Existing setting’ blank. This will render a special template that displays all publicly available sections or licenses.
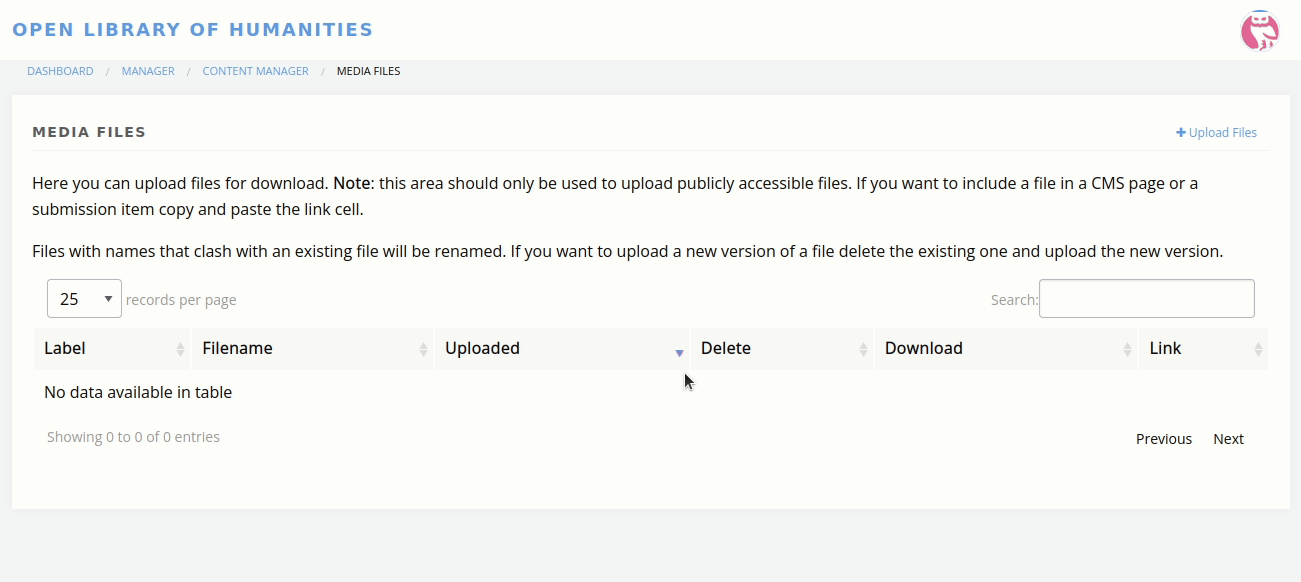
Media Files
The Media Files manager lets editors upload and host small files. Examples include:
Author Guidelines
Proofing Guidelines
Article Submission Templates
Once a file is uploaded a link is provided that you can then insert into CMS pages or templates.
Note
The Media Files section should not be used to upload videos unless you have sufficient storage space/bandwidth. If you use Janeway Hosting you should contact the support team.
Upload and deletion of a media file.
Copy-Paste and Rich Text Fields
When working on webpages, news items, and other fields such as abstracts, many people copy and paste from a word processor into Janeway. As of version 1.5.1, Janeway handles this better than before: When a user attempts to paste text that carries over styling from another application, Janeway will prompt the user to ask if they want to retain the formatting or paste as plain text.
Additionally, Janeway will always remove any potentially harmful markup being pasted in or typed using the code view across rich-text fields, such as scripts that could lead to Cross Site Scripting attacks.